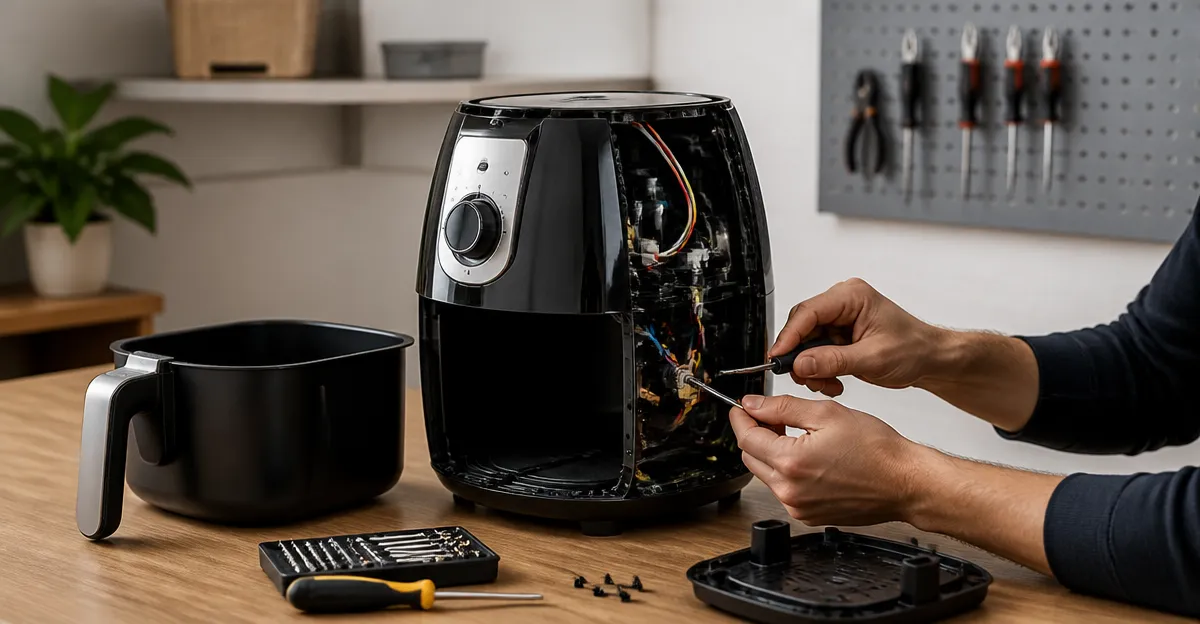
How to Repair a Mini Air Fryer: DIY Step-by-Step Fixes for the Most Common Problems
Introduction
In this guide the reader will learn how to diagnose, disassemble, and restore a malfunctioning mini air fryer. The process emphasizes safety, cost‑effectiveness, and the use of readily available tools. By following each step one can extend the lifespan of a compact appliance and avoid unnecessary replacement. Understanding the inner workings of an air fryer also provides confidence when selecting a new model if repair proves impractical.
Mini air fryers are popular because they combine rapid cooking with reduced oil usage. However, frequent use can lead to issues such as uneven heating, non‑responsive controls, or faulty safety switches. Addressing these problems requires a systematic approach that isolates the root cause before any component is replaced. This guide presents that approach in a clear, professional manner.
What You’ll Need
- Small Phillips‑head screwdriver set.
- Multimeter for testing electrical continuity.
- Soft microfiber cloth for cleaning interior surfaces.
- Replacement silicone gasket (optional, purchased separately).
- Chefman 4‑Quart Compact Air Fryer – useful as a reference unit or temporary replacement.
- Chefman 2‑Quart Mini Air Fryer – serves as a backup appliance while repairs are performed.
Step 1: Diagnose the Symptom
The first major step is to identify the exact malfunction. Common symptoms include failure to power on, irregular temperature, or audible alerts that do not stop. Use a multimeter to verify that the power cord supplies the correct voltage (120 V in North America). If the fryer does not receive power, inspect the cord for visible damage and test the internal fuse if present. Document each observation before proceeding.
When the appliance powers on but does not heat, the heating element or temperature sensor is likely at fault. In such cases one may compare the behavior with a functioning unit such as the Chefman 4‑Quart Compact Air Fryer. Observing the heating cycle on a working model provides a benchmark for normal operation.
Step 2: Prepare a Safe Work Area
Unplug the air fryer and allow it to cool for at least fifteen minutes. Place the appliance on a stable, non‑conductive surface such as a wooden table. Gather all tools within arm’s reach to avoid unnecessary movement during disassembly. Wearing insulated gloves reduces the risk of accidental electric shock while handling internal components.
It is advisable to photograph each stage of the disassembly. These images serve as a visual reference when reassembling the unit and help prevent misplaced screws. The process mirrors that of the Chefman 2‑Quart Mini Air Fryer, which shares a similar internal layout.
Step 3: Disassemble the Fryer
Locate the two screws on the rear panel and remove them with the Phillips‑head screwdriver. Gently lift the rear cover, exposing the internal wiring harness, heating coil, and fan assembly. Detach the wiring connector by pressing the release tab; this prevents strain on the contacts.
Next, unscrew the basket support brackets that hold the non‑stick basket in place. Carefully set the basket aside, noting the orientation of the silicone gasket that seals the basket to the heating chamber. The gasket can be inspected for cracks or deformation, which are common sources of heat loss.
Step 4: Inspect the Heating Element and Fan
Visually examine the heating coil for discoloration, broken wires, or carbon buildup. A healthy coil exhibits a uniform metallic sheen without any blackened sections. Use the multimeter set to resistance (ohms) to test continuity; a reading of infinite resistance indicates a broken element.
The cooling fan should rotate freely when manually spun. If the fan blades are obstructed by food particles, clean them with a soft cloth. A malfunctioning fan often triggers the safety shut‑off feature, resulting in intermittent power loss. Replacing the fan is rarely necessary, but a spare part may be sourced from the manufacturer if required.
Step 5: Replace Faulty Components
When the heating element fails the most reliable solution is to install a new element that matches the original specifications (1500 W, 450 °F capability). While this guide does not provide a specific part number, the element can be ordered from the official Chefman parts portal. Installing the new element involves reconnecting the wiring harness and securing the coil with its mounting screws.
If the temperature sensor is defective, replace it with a sensor calibrated for the same voltage range. Secure the sensor with the provided clip and ensure the connector clicks into place. After component replacement, re‑apply a fresh silicone gasket to maintain a proper seal.
Step 6: Reassemble and Test
Reverse the disassembly steps, beginning with the basket support brackets and ending with the rear panel screws. Verify that all wiring connections are snug and that the basket sits evenly within the chamber. Plug the fryer into a grounded outlet and select a simple preset such as “Fries”. Observe the heating cycle for the audible shake notification and ensure the fan operates continuously.
Use the digital display to set a temperature of 200 °F and a timer of five minutes. After the cycle completes, examine the food for even crispness. If the results meet expectations, the repair is successful. Should the appliance still exhibit irregular behavior, consult the troubleshooting section below.
Tips & Pro Tips
- Always disconnect power before handling internal components to avoid electric shock.
- When cleaning the interior, avoid abrasive pads that could damage the non‑stick coating.
- Keep a spare silicone gasket on hand; it is inexpensive and prevents heat leakage.
- Document screw locations with a small piece of paper to ensure correct reassembly.
- If the unit is under warranty, contact Chefman support before attempting component replacement.
Troubleshooting
| Problem | Possible Cause | Solution |
|---|---|---|
| Fryer does not power on | Damaged power cord or tripped internal fuse | Inspect cord for cuts; replace if necessary. Test fuse with multimeter and replace if open. |
| Food is not crisping | Heating element failure or obstructed fan | Test element continuity; replace if broken. Clean fan blades and ensure free rotation. |
| Display freezes | Loose wiring connector | Open rear panel, reseat the connector, and verify secure contact. |
| Shake notification never sounds | Faulty buzzer module | Locate buzzer on the control board and replace with an identical part. |
Conclusion
This guide has presented a systematic method for repairing a mini air fryer, covering diagnosis, safe disassembly, component inspection, and reassembly. By following each step one can restore the appliance to full functionality, thereby saving money and reducing waste. When repair is not feasible, the guide also recommends reliable replacement options such as the Chefman 4‑Quart Compact Air Fryer or the Chefman 2‑Quart Mini Air Fryer for continued healthy cooking.
One is encouraged to share repair experiences with the online community, as collective knowledge improves future troubleshooting efforts. With proper maintenance and occasional repairs, a mini air fryer can provide years of efficient, oil‑reduced cooking.
Products Mentioned in This Guide
Frequently Asked Questions
What safety precautions should I take before repairing a mini air fryer?
Unplug the unit, let it cool completely, and avoid touching hot components or exposed wires.
Which tools are essential for most mini air fryer repairs?
A small Phillips‑head screwdriver set, a multimeter, and a soft microfiber cloth are typically sufficient.
How can I diagnose uneven heating in a mini air fryer?
Check the heating element for continuity with a multimeter and clean any food residue that may block airflow.
What is a common cause of non‑responsive controls and how can I fix it?
Faulty control board contacts often cause this; inspect and clean the contacts, or replace the board if continuity fails.
When is it more cost‑effective to replace the mini air fryer instead of repairing it?
If multiple major components (heating element, control board, safety switch) need replacement and the total cost exceeds half the price of a new unit, replacement is advisable.