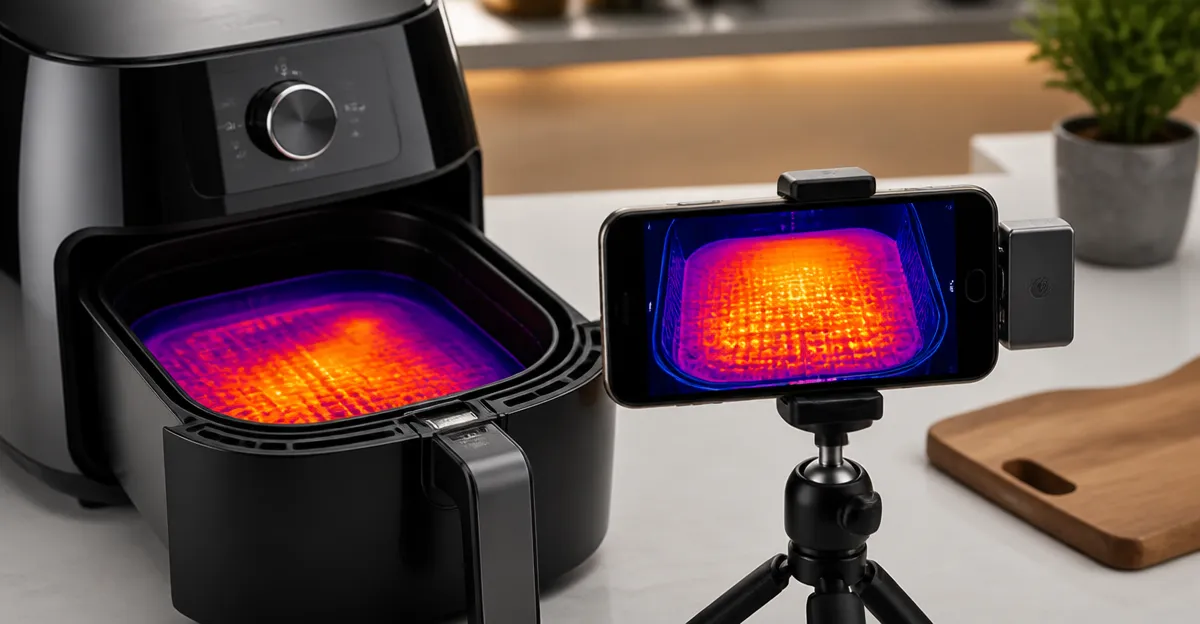
How to Test Air Fryer Hot Spots with a Smartphone Thermal Camera — Step-by-Step Guide
Introduction
Thermal imaging has become an essential diagnostic tool for homeowners and technicians who need to verify temperature uniformity in kitchen appliances. This guide explains how to locate hot spots inside an air fryer using a smartphone‑compatible thermal camera, allowing the user to optimise cooking performance and prevent premature component wear. By following the systematic procedure, one can obtain accurate temperature maps, interpret the data, and make informed adjustments without expensive laboratory equipment. The approach combines practical safety measures with the capabilities of modern thermal cameras, ensuring reliable results for a wide range of skill levels.
What You’ll Need
- Smartphone (Android or iPhone) with OTG or USB‑C support.
- Thermal camera compatible with the phone (see product recommendations below).
- Protective gloves and heat‑resistant mat.
- Non‑metallic ruler or caliper for measuring distance.
- Notebook or digital note‑taking app for recording temperature readings.
Step-by-Step Instructions
Step 1: Prepare the Air Fryer
Place the air fryer on a stable, heat‑resistant surface and allow it to cool completely before handling any external components. Remove any accessories such as the basket or tray to expose the interior cavity, which will be the primary area of inspection. Ensure the appliance is unplugged and that the surrounding workspace is well ventilated to avoid accidental burns. This preparation creates a safe environment for both the user and the thermal imaging equipment.
Step 2: Select the Appropriate Thermal Camera
Choose a thermal camera that matches the smartphone operating system. For Android devices, the TOPDON TC001 Thermal Camera offers 512x384 resolution, a low power draw of 0.35 W, and a compact 2.8 × 1.65 × 0.55‑inch form factor. Its price of $199.98 and rating of 4.6 / 5 based on 1,492 reviews indicate strong value for detailed kitchen diagnostics. iPhone users may prefer the Flir One Thermal Camera, which plugs directly into the USB‑C port of iPhone 15 and newer, provides 240x180 super‑resolution, and includes FLIR MSX technology that merges visual and thermal data for clearer interpretation. Its price of $234.06 and rating of 4.3 / 5 from 280 reviews demonstrate reliable performance for home inspection tasks.
Both devices support temperature ranges from –4 °F to 1022 °F, which comfortably exceed the maximum operating temperature of most consumer air fryers (typically around 400 °F). Selecting the correct camera ensures accurate measurements and eliminates the need for a separate handheld unit.
Step 3: Install the Camera App and Configure Settings
Launch the companion app that accompanies the chosen camera. For the TOPDON TC001, open the TOPDON app and enable the following settings: set the temperature range to “Auto” initially, then switch to manual mode once the baseline temperature is known; select a high‑contrast color palette such as “Iron” to accentuate subtle variations; and enable the point, line, and surface measurement modes to capture temperature data at multiple locations simultaneously. For the FLIR One, activate the MSX overlay, choose the “Rainbow” palette for intuitive hot‑spot identification, and calibrate emissivity to 0.95 for typical kitchen surfaces (non‑metallic, matte finishes). These configurations maximise the camera’s ability to differentiate between normal heat distribution and localized overheating.
Record the ambient room temperature using the app’s built‑in thermometer; this reference value will be used later to calculate temperature differentials inside the fryer.
Step 4: Position the Camera for Optimal View
Attach the thermal camera to the smartphone using the supplied USB‑C connector (or OTG adapter for Android). Hold the device at a distance of approximately 12‑18 inches from the interior surface, ensuring the entire cavity fits within the 40° × 30° field of view of the TOPDON TC001 or the 50° field of view of the Flagfront Thermal Camera if a budget option is preferred. Use a non‑metallic ruler to maintain a consistent distance, as variations can affect apparent temperature readings. The camera’s compact design (weighing only 30 g) allows one‑handed operation without obstructing the view.
For the FLIR One, the integrated visual camera provides a live picture‑in‑picture view, making it easier to align the thermal frame with the air fryer’s interior geometry. This alignment reduces parallax error and ensures that hot‑spot locations are recorded precisely.
Step 5: Capture Baseline Thermal Image
Power on the air fryer and set it to a low temperature (e.g., 200 °F) for a five‑minute warm‑up period. During this time, capture a thermal image of the empty cavity to establish a baseline heat distribution. The TOPDON TC001’s 25 Hz refresh rate provides smooth real‑time feedback, allowing the user to observe the gradual rise in temperature across the walls and heating element. Save the image using the app’s “Save” function; the file will be stored in the device’s internal memory for later comparison.
Document the highest, lowest, and average temperatures displayed on the screen, noting the exact location of each reading (e.g., “upper right corner of the heating coil”). This data will serve as a reference point for subsequent hot‑spot detection.
Step 6: Perform High‑Temperature Test
Increase the air fryer to its maximum cooking temperature (typically 400 °F) and allow it to run for ten minutes with the basket empty. While the appliance operates, capture a series of thermal images at one‑minute intervals. The TOPDON TC002C Duo Thermal Camera, priced at $242.99 with a rating of 4.5 / 5, offers a 512x384 super‑resolution image and a 25 Hz refresh rate, making it ideal for monitoring rapid temperature changes. Its USB‑C compatibility ensures a seamless connection to newer Android phones and iPads, and the device’s 5‑meter measurement range permits safe observation from a distance.
During each capture, use the app’s waveform graph to record the temperature trajectory of the heating element. Pay particular attention to any localized spikes that exceed the average by more than 15 °F, as these indicate potential hot spots caused by uneven heat distribution or a malfunctioning coil.
Step 7: Analyse the Thermal Data
After the high‑temperature run, review the saved images side by side. The TOPDON TC001’s image fusion function can overlay the thermal map onto a visible photograph, highlighting the exact physical location of each hot spot. Identify patterns such as “hot bands” along the side walls or isolated peaks near the fan assembly. Use the app’s measurement tools to record the precise temperature of each anomaly, noting the distance from the heating element.
If the FLIR One is employed, the MSX overlay will already display visual context, allowing the analyst to correlate hot spots with structural features such as metal brackets or insulation gaps. Export the images to a computer for further annotation if required.
Step 8: Mitigate Identified Hot Spots
Based on the thermal analysis, take corrective actions. Common remedies include cleaning residue from the heating coil, ensuring the air‑flow fan is unobstructed, and verifying that the basket is positioned correctly to allow even circulation. For persistent hot spots near the interior wall, consider adding a thin layer of heat‑resistant silicone gasket to improve thermal contact. Re‑run the high‑temperature test after each adjustment to confirm that the temperature distribution has become more uniform.
Document each modification and its impact on the thermal profile; this record will be valuable for future maintenance and warranty claims.
Tips & Pro Tips
- Always calibrate emissivity for the material being inspected; kitchen interiors are typically matte plastic or metal, which have emissivity values between 0.85 and 0.95.
- Use the 9‑color palette options of the TOPDON TC001 to quickly differentiate between subtle temperature gradients; the “Rainbow” palette is especially useful for visual learners.
- If the USB‑C connector does not reach the phone due to a protective case, employ the 19.7‑inch extension cable supplied with the TOPDON TC001 to maintain a secure connection.
- For prolonged testing, select a camera with extended battery life such as the TOPDON TC004 Mini, which offers up to 15 hours of runtime on a single charge.
- When working in a bright kitchen, increase screen brightness and enable the app’s “high‑contrast” mode to improve readability of temperature readouts.
Troubleshooting
| Problem | Possible Cause | Solution |
|---|---|---|
| No image appears on the phone | Improper USB‑C connection or incompatible phone model | Verify that the phone supports OTG (for Android) or USB‑C (for iPhone). Use the supplied extension cable if a case interferes. |
| Temperature readings seem inconsistent | Incorrect emissivity setting or reflective surface | Adjust emissivity in the app to match the surface material; avoid measuring shiny metal without applying a matte coating. |
| App freezes during image capture | High GPU load from super‑resolution mode | Disable the optional frame‑freeze feature on the TOPDON TC002C Duo, or reduce the refresh rate to 15 Hz. |
Conclusion
By following this systematic approach, one can accurately detect and address hot spots within an air fryer using a smartphone‑compatible thermal camera. The combination of precise temperature measurement, real‑time imaging, and actionable mitigation steps ensures that the appliance operates efficiently and safely. Whether the user selects the high‑resolution TOPDON TC001, the versatile TOPDON TC002C Duo, the budget‑friendly Flagfront model, or the iOS‑centric FLIR One, each tool provides the necessary data to improve cooking performance and extend the lifespan of the air fryer.
Products Mentioned in This Guide
Frequently Asked Questions
What equipment is required to test air fryer hot spots with a smartphone thermal camera?
You need a smartphone with OTG/USB‑C, a compatible thermal camera, protective gloves, a heat‑resistant mat, a non‑metallic ruler or caliper, and a method to record temperature readings.
How do I safely capture thermal images inside an air fryer?
Turn off and unplug the fryer, let it cool, wear heat‑resistant gloves, place a heat‑resistant mat underneath, and use the camera through the door without touching hot surfaces.
What distance should I keep between the thermal camera and the air fryer for accurate readings?
Maintain a distance of about 10–15 cm (4–6 in) and use a ruler to ensure consistent spacing for optimal focus and field‑of‑view.
How can I interpret the temperature map to identify hot spots?
Hot spots appear as noticeably warmer (red or orange) areas on the map compared to surrounding zones, indicating uneven heating that may need adjustment.
Can any smartphone thermal camera be used for this test?
Only cameras that are compatible with your phone’s operating system and support appropriate resolution and emissivity settings should be used.