Introduction
One will learn how to repurpose a conventional toaster oven into a functional mini air fryer, extending its culinary versatility. This transformation enables healthier cooking methods, such as low‑oil frying, while preserving the original appliance's baking and broiling capabilities. The guide provides clear, actionable instructions that balance safety with efficiency, ensuring that the conversion does not compromise the oven's structural integrity. By the end of the article, one will possess a reliable, cost‑effective air‑frying solution without purchasing a dedicated unit.
What You'll Need
- Standard countertop toaster oven with a removable rack or tray.
- Metal cutting tools (tin snips or a fine‑toothed hacksaw) for custom adjustments.
- Heat‑resistant silicone gloves for safe handling during preheating.
- Thermometer capable of measuring up to 500°F to verify temperature limits.
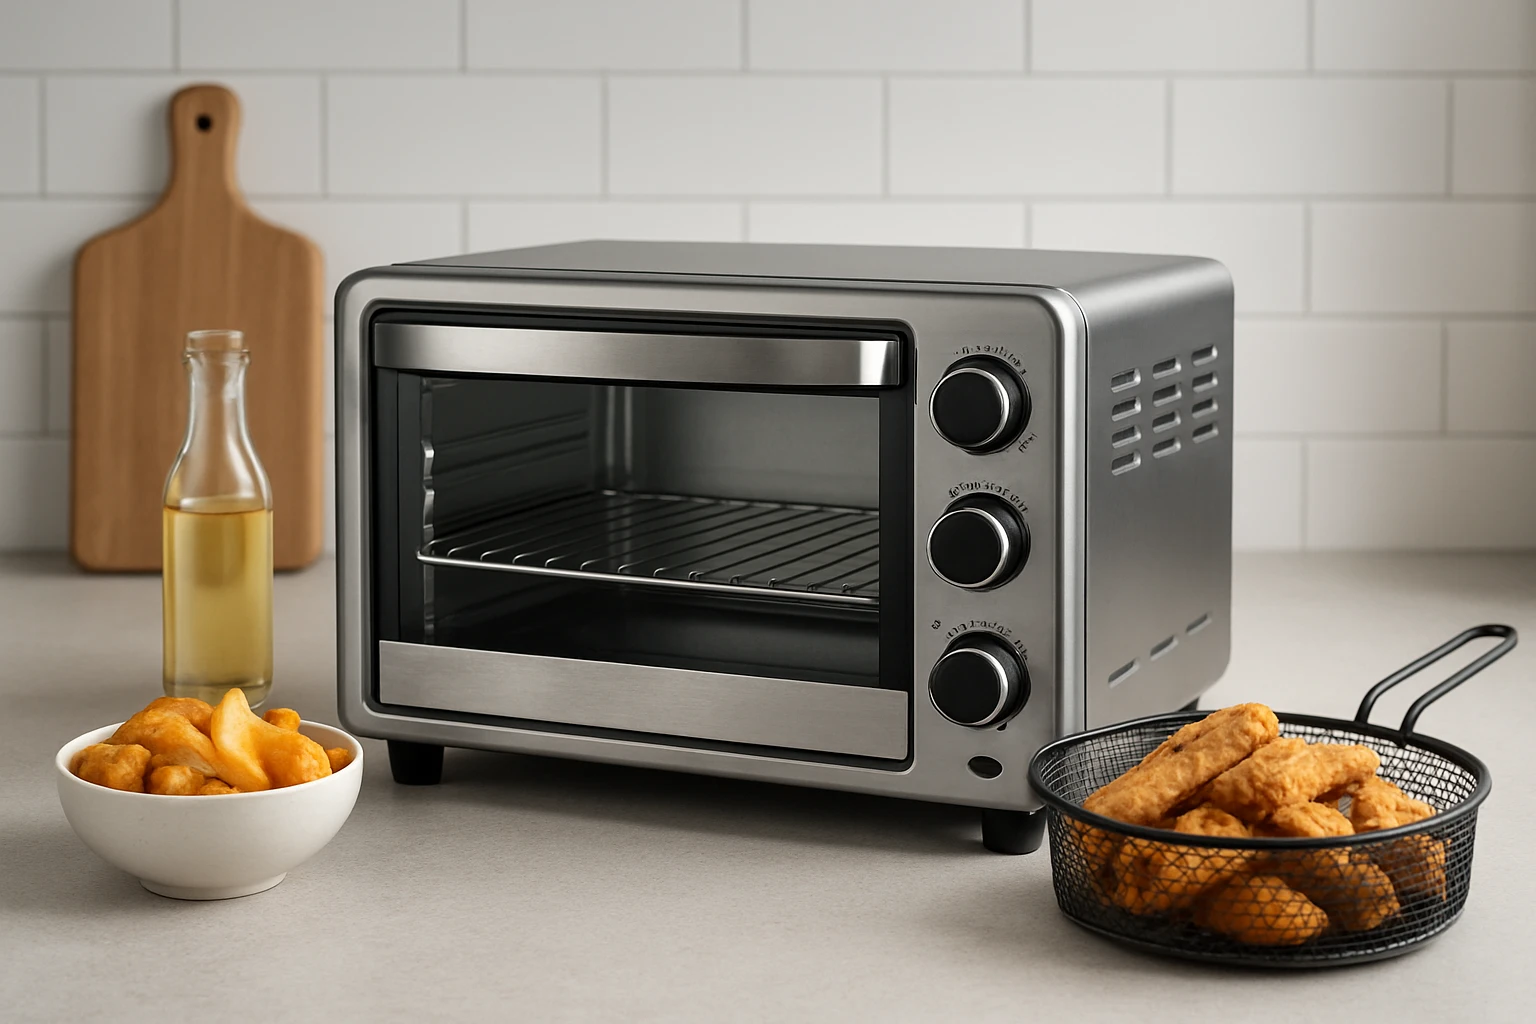
- GWY Air Fryer Basket – a 12.4" × 11" steel basket designed for Cuisinart TOA series air fryers.
Step 1: Assess Your Toaster Oven
One should begin by examining the interior dimensions of the toaster oven, measuring width, depth, and height to confirm compatibility with a standard air‑fry basket. Verify that the heating elements are exposed and that there is sufficient clearance for air circulation, as restricted airflow reduces crisping performance. Document any irregularities, such as protruding knobs or uneven shelves, because these may require minor modifications before installing the basket. This assessment prevents wasted effort and ensures that the subsequent steps proceed smoothly.
Step 2: Prepare the Workspace and Safety Gear
Before any cutting or assembly, one must clear a stable work surface and don heat‑resistant silicone gloves, safety goggles, and a dust mask to protect against metal shavings. Arrange the toaster oven, tools, and the GWY Air Fryer Basket within arm’s reach to avoid unnecessary movement. Ensure the area is well‑ventilated, as metal dust can be irritating when inhaled. Proper preparation reduces the risk of accidents and maintains a tidy environment for precise measurements.
Step 3: Modify the Existing Rack (If Necessary)
If the original rack interferes with the basket’s dimensions, one should remove it and trim excess metal using tin snips, cutting only where clearance is required. Measure the trimmed sections against the basket to confirm a snug but non‑restrictive fit, allowing at least a half‑inch gap on each side for airflow. Sand any sharp edges with a fine‑grit file to prevent damage to the basket’s non‑stick coating. This modification ensures that the basket sits level and that hot air can circulate uniformly around the food.
Step 4: Install the GWY Air Fryer Basket
Place the GWY Air Fryer Basket onto the prepared rack, confirming that the 12.4" × 11" dimensions align with the interior space measured earlier. The basket’s food‑grade steel construction offers durability, a maximum heat resistance of 480°F, and compliance with FDA standards, making it ideal for high‑temperature air frying. Its dishwasher‑safe design simplifies cleanup, while the mesh structure promotes even airflow, a critical factor for achieving a crisp exterior on fried foods. Secure the basket so that it does not shift during operation, which could cause uneven cooking or safety hazards.
Step 5: Preheat the Modified Oven
Following the manufacturer’s recommendation, preheat the toaster oven with the basket inside at 300°F for ten minutes, using a thermometer to verify the temperature. This preheating step stabilizes the steel’s dimensions, reducing the risk of deformation that can occur if the basket is introduced to sudden high heat. Observe the basket for any signs of warping; if deformation is detected, allow the oven to cool completely before adjusting the rack or seeking an alternative basket size. Proper preheating extends the basket’s lifespan and ensures consistent cooking results.
Step 6: Test Air‑Fry Functionality
To validate the conversion, one should prepare a simple test batch, such as a handful of frozen french fries, spreading them evenly across the basket’s mesh surface. Set the oven to 375°F and cook for 12‑15 minutes, shaking the basket halfway through to promote uniform browning. Monitor the fries for desired crispness; if they appear soggy, increase the temperature by 10‑15°F or extend the cooking time by a few minutes, adjusting based on the thermometer’s feedback. This trial run confirms that the airflow and heat distribution are sufficient for typical air‑frying tasks.
Step 7: Optimize Cooking Settings for Various Foods
Different foods require specific temperature and time adjustments; for chicken wings, a temperature of 400°F for 20‑25 minutes yields a golden exterior while preserving juiciness. Vegetables, such as Brussels sprouts, benefit from 375°F for 12‑15 minutes with a light oil spray to enhance caramelization. Record these parameters in a personal reference chart, noting any variations caused by the oven’s specific heating pattern. Tailoring settings to each ingredient maximizes the mini air fryer’s performance and reduces the need for trial‑and‑error in future meals.
Tips & Pro Tips
- Use a light coating of high‑smoke‑point oil (e.g., avocado oil) to achieve optimal crispness without excessive greasiness.
- Arrange food in a single layer on the basket’s mesh; overcrowding impedes airflow and results in uneven browning.
- Periodically clean the basket after each use; the dishwasher‑safe feature of the GWY Air Fryer Basket removes residue quickly, preventing buildup that could affect flavor.
- Rotate the basket halfway through cooking for larger ovens where heat distribution may be slightly uneven.
- Invest in a digital oven thermometer to verify that the internal temperature matches the set point, especially for recipes requiring precise heat.
Troubleshooting
Problem: Food remains soggy after the recommended cooking time.
Solution: Increase the oven temperature by 10‑15°F and ensure the basket is not overloaded. Verify that the preheating step was completed, as insufficient preheat can reduce initial airflow velocity.
Problem: Basket shows signs of warping after repeated use.
Solution: Confirm that the oven never exceeds 480°F, the basket’s maximum heat resistance. Allow the basket to cool gradually after each session and avoid sudden temperature spikes caused by broil settings.
Conclusion
One has now transformed a conventional toaster oven into a versatile mini air fryer, enabling healthier cooking methods without purchasing a dedicated appliance. By following the systematic steps—assessment, preparation, modification, installation of the GWY Air Fryer Basket, preheating, testing, and optimization—any user can achieve reliable, crispy results across a range of dishes. The guide empowers readers to experiment confidently, knowing that safety and performance have been prioritized throughout the conversion process.
Products Mentioned in This Guide
Frequently Asked Questions
Can any countertop toaster oven be converted into a mini air fryer?
Most standard toaster ovens with a removable rack can be adapted, but you should verify size clearance and temperature ratings first.
What tools and safety gear are needed for the conversion?
You’ll need metal cutting tools (tin snips or a fine‑toothed hacksaw), heat‑resistant silicone gloves, and a thermometer that reads up to 500°F.
How does the GWY Air Fryer Basket fit inside a typical toaster oven?
The 12.4" × 11" steel basket is sized for Cuisinart TOA series ovens and slides onto the existing rack, creating a dedicated air‑fry chamber.
Will converting the oven affect its original baking and broiling functions?
No; the conversion is reversible, so you can remove the basket and use the oven as originally intended.
What temperature limits should I monitor after the conversion?
Keep the oven below its maximum rated temperature (usually 450‑500°F) and use a thermometer to ensure safe operation.